
Hygiene Inspections
Run your daily hygiene and premises checks off a fixed checklist: mark each item pass or fail, save the record for the day, and pull up past months for audits or follow-up.
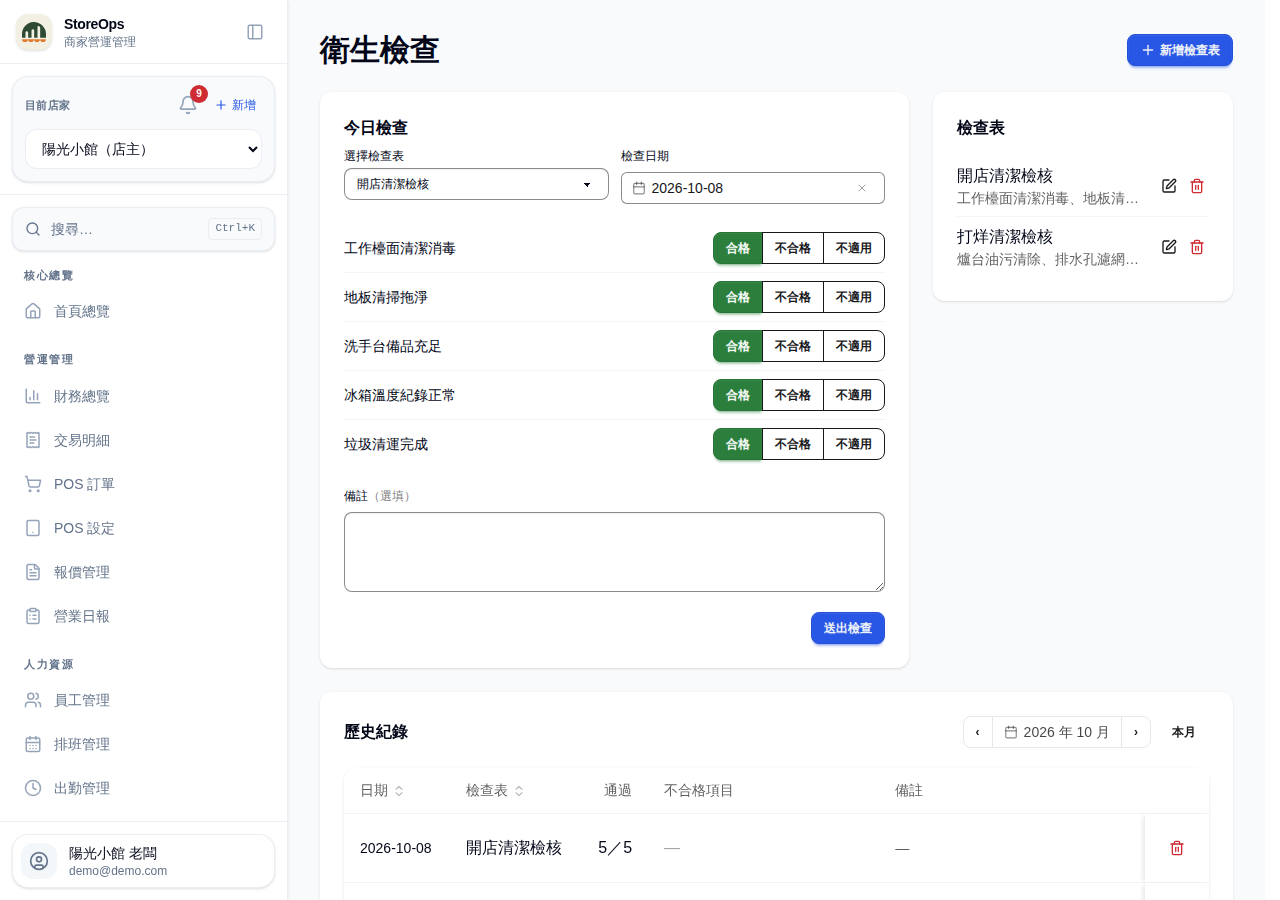
Submit today's check
- Open Hygiene Inspections from the left menu — Today's Check is the first section.
- Pick a checklist under Select checklist. Check date defaults to today; change it if you're backfilling yesterday or an earlier day.
- Mark each item Pass, Fail, or N/A. Everything starts as Pass, so you only touch the items with a problem; use N/A for equipment that wasn't in use.
- Use Note below the list to spell out the issue and what was done — fridge running warm, temperature adjusted; grease on the floor, re-mopped.
- Click Submit check. You'll see Check record submitted when it's saved.
Staff can submit checks; no manager permission needed. If no checklist exists yet you'll see No checklist yet. Ask a manager to create one. — ask your manager to add one first. Records currently take a text note only — photos can't be uploaded. Keep any defect photos somewhere else.
Create and maintain checklists
- Click Add checklist at the top right. Your checklists are listed in the Checklists section on the right (on phones, below today's check).
- Enter a Checklist name, for example "Daily opening hygiene check".
- Under Check items, type one item per line — countertops clean, floor free of grease, fridge temperature normal, and so on.
- Leave Active (available for checks) on so the checklist shows up in the dropdown above. Turn it off for checklists you've paused; they'll be tagged Inactive.
- Click Create. Later, use Edit on the row to rename it or change items, or Delete to remove the whole checklist.
Adding, editing, and deleting checklists all require Manager permission — staff don't see this section at all. Deleting a checklist warns that existing records are kept — past checks don't disappear with it.
Review history
- The History section at the bottom lists every check, one month at a time.
- Use the previous / next arrows at the top right, click the month to jump directly, or hit Today to come back to the current month.
- Each row shows Date, Checklist, Passed (e.g. 8/10), Failed items, and Note. Failures get a red badge plus the names of the items that failed, which makes follow-up easy.
- To remove a record submitted by mistake, click the delete icon on that row and confirm.
With nothing recorded yet you'll see No check records this month. Deleting a check record requires Manager permission.